Step 1: Create App-Only Categories and Items in Clover
First, all items must be created in Clover before they can appear in Smart Online Order.
-
If you require assistance with creating menu items on your Clover system please reach out to your Clover agent or Clover Support.
-
Log in to your Clover Dashboard.
-
Create new categories that will be used only for the mobile app menu (for example: “App Exclusives” or “Mobile-Only Specials”).
-
Add new items under these categories.
-
For each item, confirm the following settings:
-
The item is assigned to a category
-
The item is set to Available
-
The item is shown on POS/Register
-
The item is not an item variant
-
The price type is set to Fixed Price (not Variable Price)
-
Once completed, your app-only items are ready to be imported into Smart Online Order.
Step 2: Manually Sync Clover Inventory to Smart Online Order
After creating new items or categories in Clover, you must manually sync them into Smart Online Order.
-
Log in to your Smart Online Order website (WordPress Admin).
-
Click the Clover Orders button (Red Button).
-
From the left-hand blue menu, go to Import / Sync Inventory.

Manual Sync
In the Manual Sync section, click the following buttons in this exact order:
-
Update all items
-
Update Categories
-
Update Modifiers
-
Update Order Types
-
Update Taxes
-
Allow one to two minutes for each step to complete. Can at times be longer based on the size of your inventory and how long it was since your last Manual Sync and Clean.

Clean Inventory
This step removes items that were deleted in Clover but still appear online.
-
In the same Import / Sync Inventory page, locate the Clean Inventory section.
-
Click Clean Inventory.
-
Follow the prompts in the pop-up window.
-
Wait for each step to finish before proceeding.
This ensures your Smart Online Order system matches your Clover menu accurately.

Step 3: Create a New Smart Online Order Menu Page
Next, you will create a new menu page that will be used specifically for the mobile app. Click on the article below to learn how to create the new menu page.
This new page will be managed separately from your existing Smart Online Order menu.
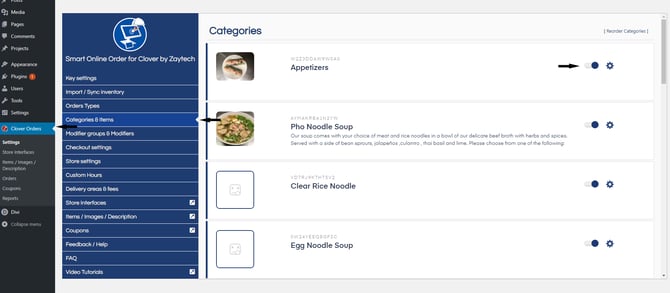
Step 4: Hide App-Only Categories From Your Existing Online Menu
To prevent app-only categories from appearing on your main online ordering menu:
-
Open the Smart Online Order Plugin Settings in WordPress.
-
From the left side blue menu click on Categories & Items.
-
Hide the newly created app-only categories from your existing menu page.
Step 5: Add the New Menu to Your White-Labeled Mobile App
Once your new Smart Online Order menu page is ready, you must connect it to your mobile app.
-
Log in to the Loyalty Dashboard: https://v2.dashboard.smartonlineorder.com/auth/login

-
Click Locations from the left-hand menu.
-
Select your store location.
-
Navigate to the Menus section.
-
Click Add New Menu.

Set the Menu Data Source
-
When prompted for a data source, enter the URL of your new Smart Online Order menu page.
-
Example (if using a Smart Online Order subdomain): https://yourstorename.smartonlineorder.com
Configure Menu Settings
- Set up the new menu name from the section Title
-
Select which order types should be available
-
Choose which categories should appear
-
Review and confirm all settings
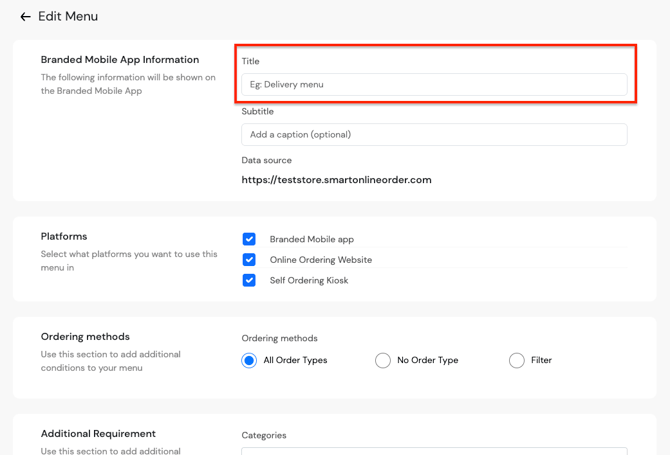
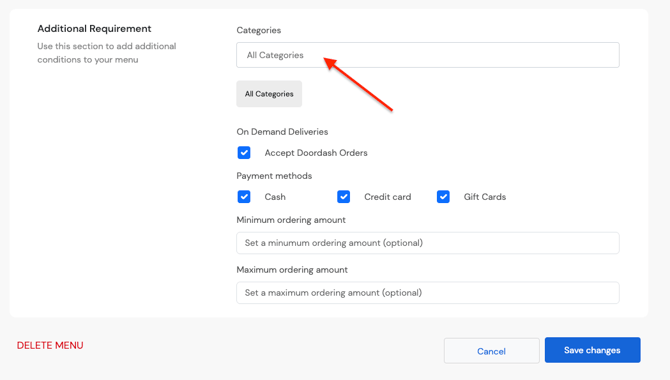
Click Save at the bottom of the page to apply your changes.
Reminder
-
Any future changes to app-only items must be made in Clover first, then synced into Smart Online Order.
-
The app menu and website menu are managed independently once set up correctly.