Reordering Categories on Your Menu Page
This article will show you how to reorder the categories that appear on your Smart Online Order menu page. You can easily adjust the order by dragging and dropping the categories into your preferred layout.
Step 1: Log in to Your Smart Online Order Page
To begin, log in to your Smart Online Order page using the information you received during the setup of the Smart Online Order application.
Step 2: Access Categories & Items
-
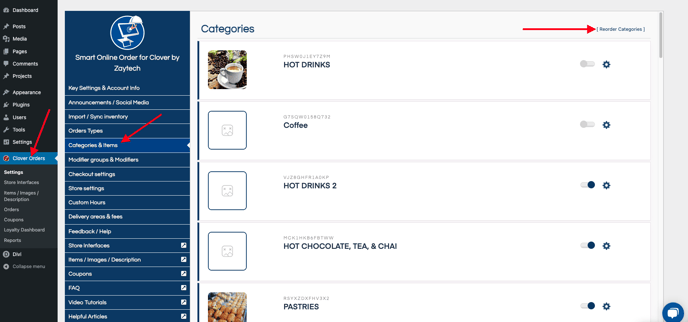
From your WordPress dashboard, click on Clover Orders.
-
Select Settings.
-
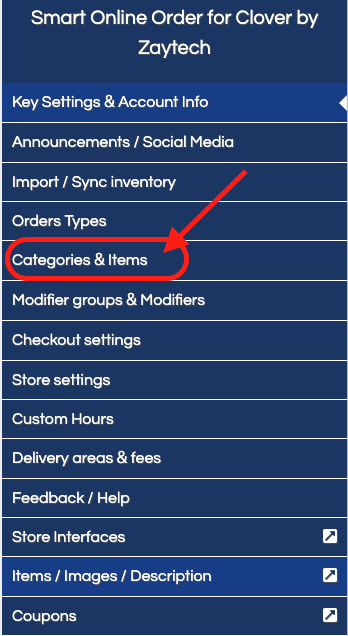
Choose Categories & Items.

Step 3: Open the Reorder Categories Page
-
On the top right-hand side of the page, click the Reorder Categories button.
-
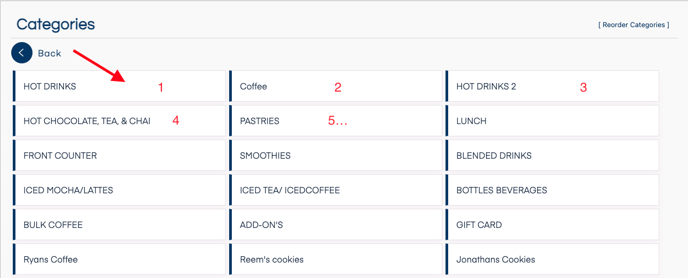
This will take you to the reorder categories page.

Step 4: Reorder Categories
-
Use the drag-and-drop feature to rearrange your categories.
-
The top left category will appear first on your menu page.
-
The order continues from left to right across the page.
-
-
Once you have finished reordering, click on the back arrow in the top left corner of the page.
-
Your changes will be automatically saved.

Summary
-
Navigate to Clover Orders → Settings → Categories & Items.
-
Click Reorder Categories in the top right corner.
-
Drag and drop the categories into the order you prefer.
-
Use the back arrow to save your changes.