Disclaimer
At the time of writing, Apple Pay is only available when using the Safari web browser. If you are using Google Chrome or another non-Safari browser, Apple Pay will not appear as a payment option on the Smart Online Order Checkout page.
This limitation stems from Apple’s integration policies, which restrict Apple Pay functionality to Safari. These policies are designed to provide a secure and seamless checkout experience.
Getting Started
On the Merchant Dashboard:
-
Go to Accounts & Setup, then Ecommerce Payments.
-
Scroll down to Apple Pay > IFrame integration, and click the blue link in the instructions to enter information about the e-commerce website domain.

When you click the blue link either on the Developer Dashboard or the Merchant Dashboard, the Enable Apple Pay pop-up appears.
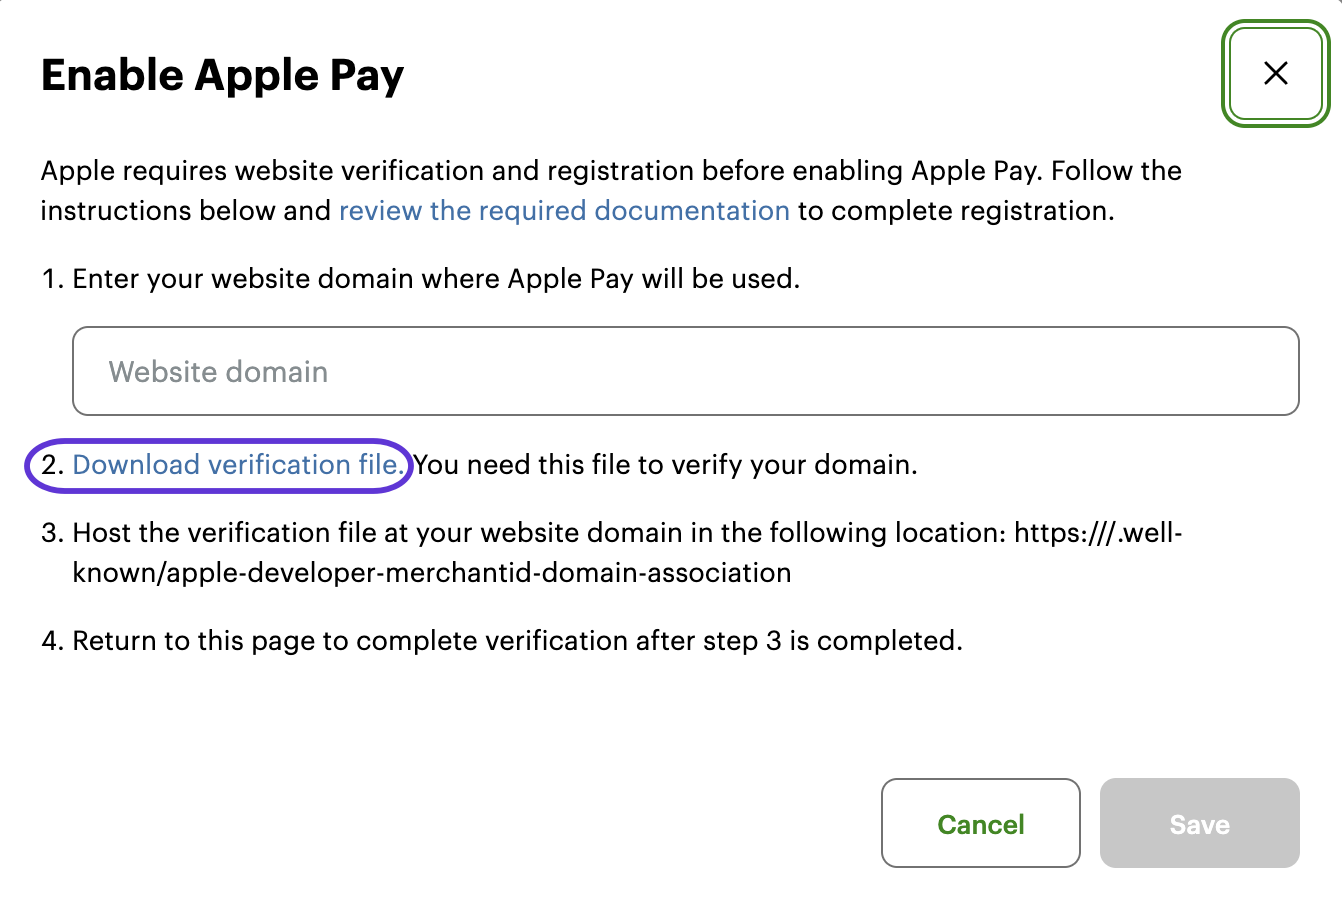
- In the Website domain field, enter the merchant's e-commerce website link.
- Click the Download verification file link.
- From instruction 3 on the pop-up, copy the location where you need to host the verification file and click Save.
- Return to your Smart Online Order page, and then on the left side menu bar, click on the option "Apple Pay Verification" and upload the file you saved in the last step.

- Go back to the IFrame integration section, and click Verify next to the domain you added. One of the following statuses appears:
- Successful verification—Status updates to Verified.
- Unsuccessful verification—An error message appears. In this case:
- Double-check that you have entered the correct information when creating the Apple Pay verification in the first step above.
- Make sure the verification file is in the correct location on your e-commerce website:
https://{domain}/.well-known/apple-developer-merchantid-domain-association. - Make sure the domains are not behind a proxy or redirect and are accessible to Apple servers.