Configuring what items, order types, and payment methods are available on your kiosk
Available on the loyalty dashboard through locations, menus, then editing menu.
Accessing the settings
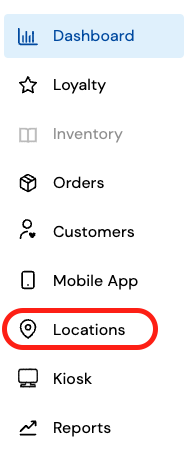
In order to add new menus to your kiosk you will need to login to your provided login page and then click on "locations" from the left-hand side of the page and click on your store location.

Accessing the menu
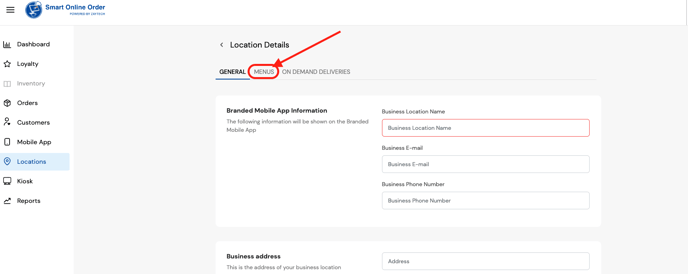
From there click on the section called "menus" then click on the three dots of the menu you would like to work on. You will then see another menu where you can click on the edit menu.

Managing the system
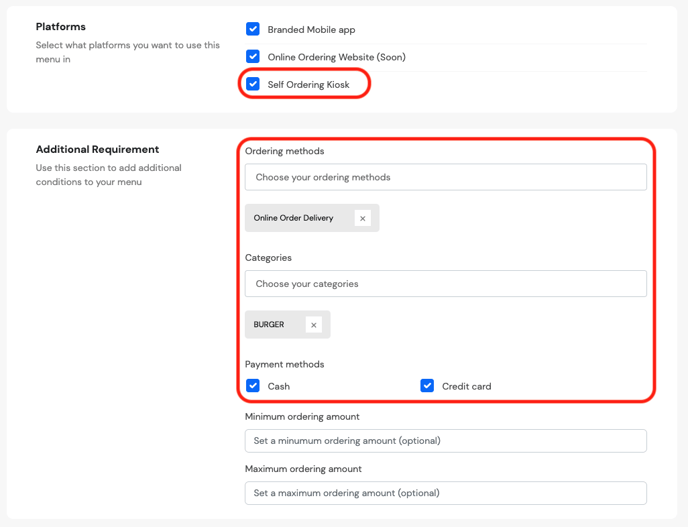
On the following page, you will be able to choose how your menu will appear such as choosing what order types, categories, and payment methods you would like to enable on your kiosk.
If you are noticing that your menu categories and order types are not showing your full menu then you will first need to perform a manual clean and sync to import changes from your Clover Inventory to your Smart Online Order system.
 Ordering Methods
From this section, you can choose which order types will appear on your kiosk at checkout else if you leave it empty it will show all.
Categories
From this section, you can choose which specific categories you would like to appear on the kiosk by manually choosing them from this section else leave them empty to show all categories.
Payment Methods
From this section, you can choose what options your clients will have to be able to checkout with. With the cash option, your clients will be prompted to go to a cashier in order to finish their transactions.
Min and Max Order amounts
From this section, you can set a minimum amount and the maximum amount required to be able to check out from your kiosk.
Save your changes
Once completed scroll down to the bottom of the page in order to click on the save changes option in order to finalize your changes.
