Part 1:Adding/Removing Order Types on your Clover Dashboard
While Smart Online Order automatically adds the order types of Online Order Pickup and Online Order Delivery further order types are also imported from your Clover Dashboard.
Login To Your Clover Web Dashboard
To do so log onto your Clover Dashboard of the Clover Merchant Account that your Smart Online Order system is connected to: https://www.clover.com/dashboard
Access the Business Information Page
Access the Business Information Page:
On the top right of the page click on the gear icon:

From the page that appears choose the bottom option called "View All Settings"
Access Order Types Page
On the following page under the transactions tab click on Order Types
![]()
Add/Remove Order Types
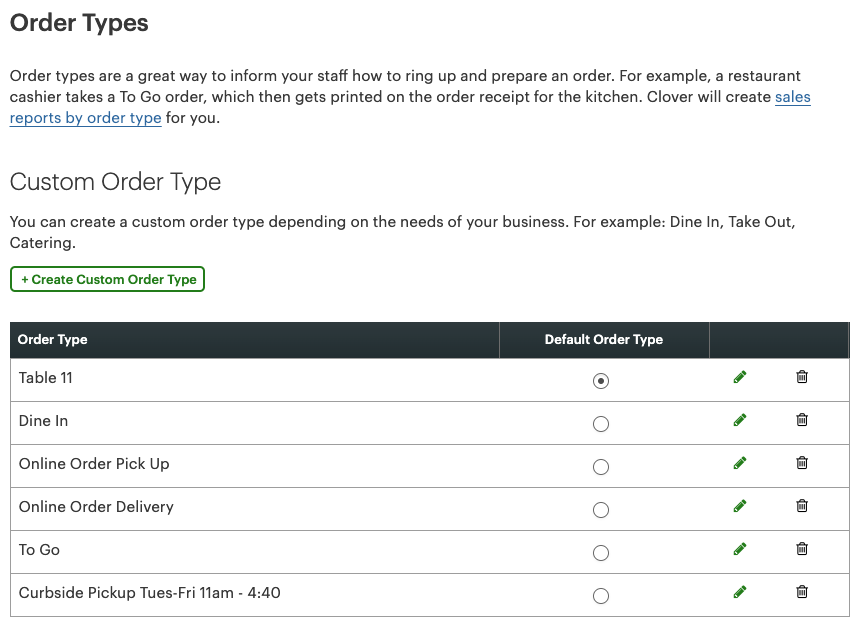
On the following page, you will see the order types that are available on your Clover System
- In order to add or remove order types correctly they must be added from this page, deleting them from your Smart Online Order WordPress plugin settings will cause them to be readded again after performing a manual sync and clean if they are not removed from this page.
- Once completed adding or removing order types from this page you are REQUIRED to perform a manual sync and clean from your Smart Online Order WordPress plugin settings else order types will not be added/removed from your Smart Online Order system.
Add or remove order types from this page
In order to add or remove order types to your Smart Online Order system after having added them to your Clover Dashboard you will be required to perform a manual sync and clean:
How to perform a manual sync and clean
Part 2:Configuring Order Types From your Smart Online Order Plugin Settings.
Access your Smart Online Order website plugin.
First login to the website where you have your Smart Online Order website plugin installed.
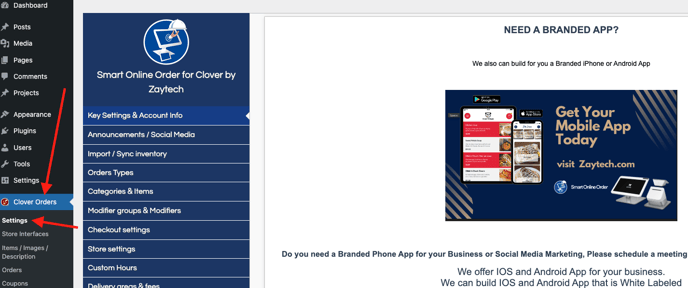
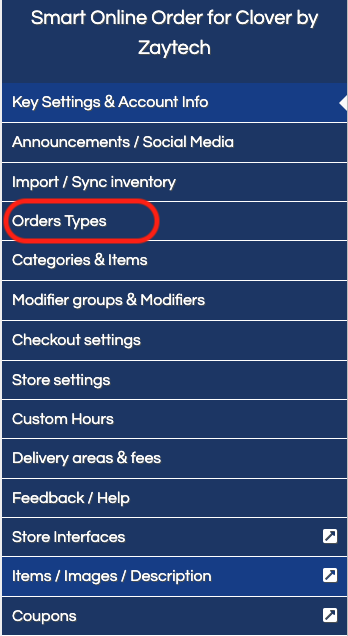
Access the Order Type Settings page.
Next on the blue menu click on the option called "Order Types"
Managing Order Types
From the following page, you will see the order types imported from your Clover Dashboard from the last time of manual sync and clean.
- Order types highlighted in green are active on your Smart Online Order System
- Order types that are grey are NOT active on your Smart Online Order System.

Activate/Deactivate Order Types
In order to enable or disable order types click on the edit button on the order type you would like to work with.
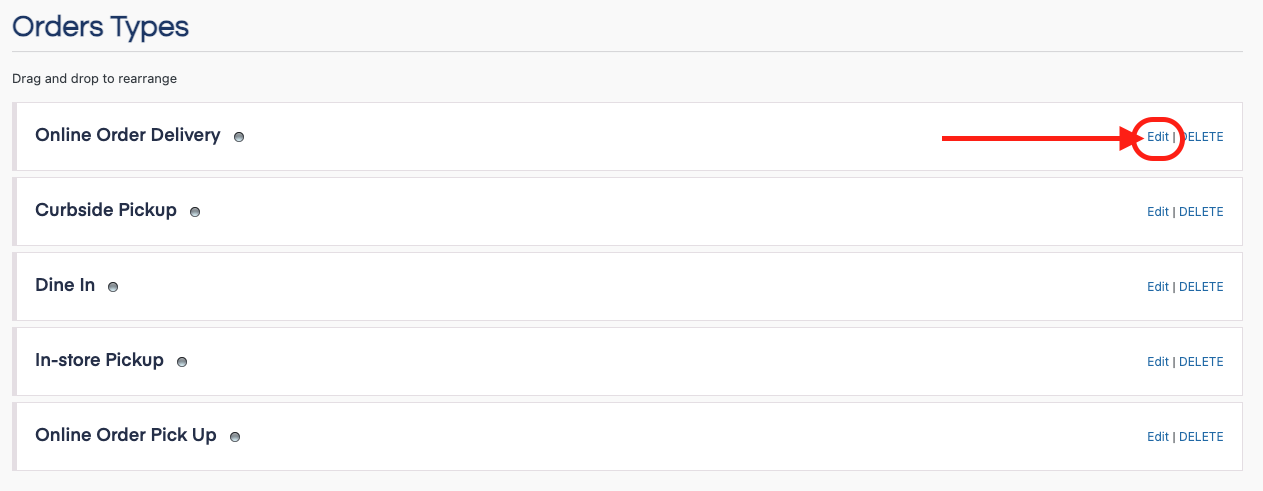
From the menu that opens below that order type you will have access to a menu where you can further customize the order type to work to your liking, in this case, click on the disable/enable option with grey meaning to disable and blue meaning to enable the order type.
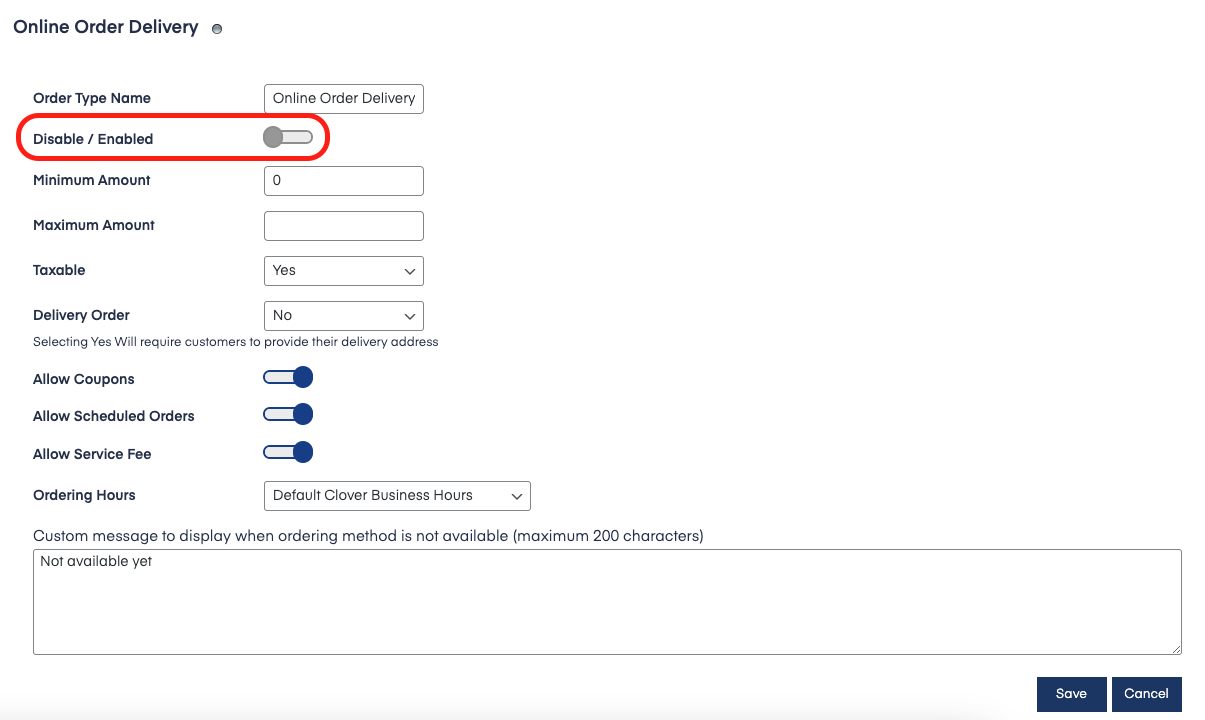
Save your changes
Scroll down and click on save changes in order to save your settings.
Delivery Order Types
In order to set up a delivery order type that requires clients to enter their address to be compared to your active delivery zones from the Smart Online Order website plugin you will need to configure the Order type to act as a delivery order type.
DISCLAIMER
- Smart Online Order currently does not work with any 3rd party delivery companies and any order types imported from your Clover Dashboard DO NOT and WILL NOT connect with any 3rd party delivery companies.
- The Smart Online Order applications delivery function is meant to be managed with in-store delivery that you will need to manually manage as the orders come in.
click on the edit button on the order type you would like to work with.
From the menu that opens below that order type you will have access to a menu where you can further customize the order type to work to your liking, in this case, click on the dropdown option called "Delivery Order" and choose yes/no.
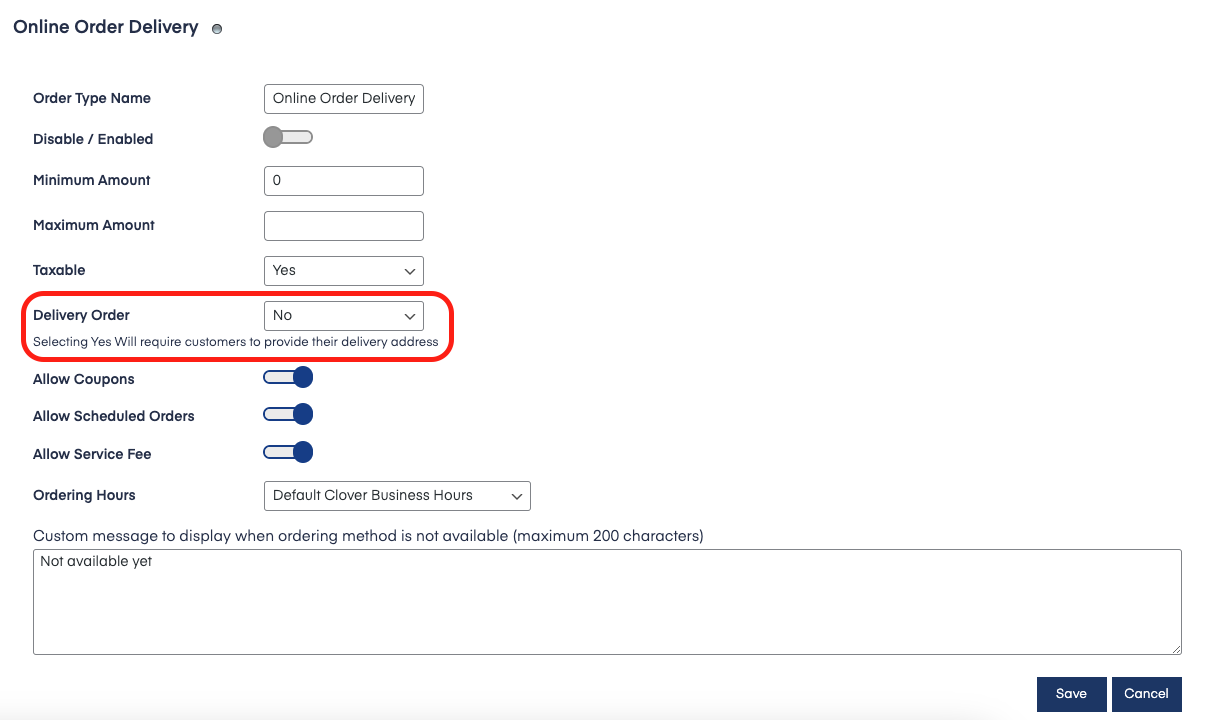
Save your changes
Scroll down and click on save changes in order to save your settings.
Enable/Disable an order type from being taxable
You can set individual order types to be taxable via changing a setting on the order type, once enabled/disabled when a client chooses that order type at checkout their order with then include or remove taxes from their order.
click on the edit button on the order type you would like to work with.
From the menu that opens below that order type you will have access to a menu where you can further customize the order type to work to your liking, in this case, click on the dropdown option called "Taxable" and choose yes/no.
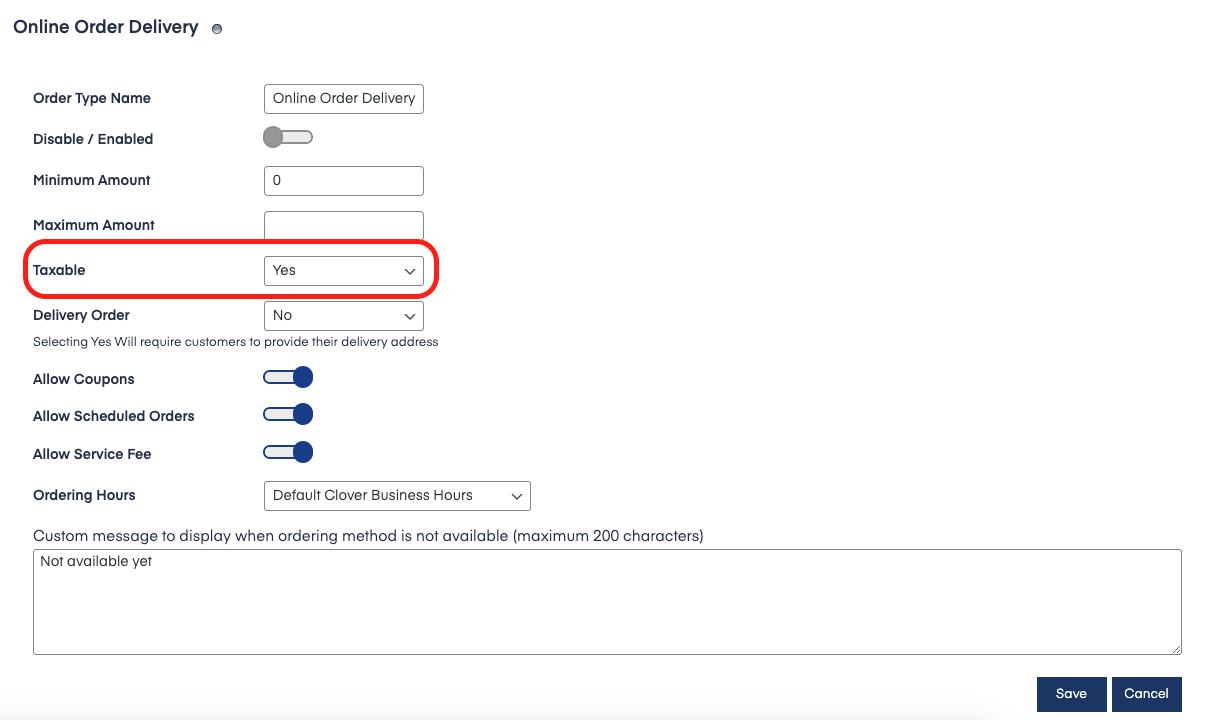
Save your changes
Scroll down and click on save changes in order to save your settings.