Step 1: Install Smart Online Order onto your Clover Merchant Account
Login into your Clover Dashboard
Use the left-hand side black menu bar and scroll down until you see the option called "More" and click on that option.
In the search bar that appears enter "Smart Online Order" and click enter to be taken to the search results page.
Click on the blue icon called Smart Online Order.

You will then be taken to the app listing page for the Smart Online Order application, click on the green connect option and add Smart Online Order to your account.

Step 2: Create a Smart Online Order subdomain:
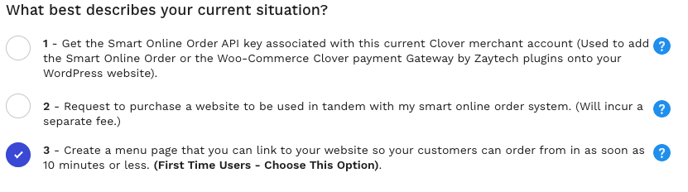
Once you have installed Smart Online Order onto your Clover Merchant Account. From the left-hand side menu bar scroll down until you see the option called "Smart Online Order" and then click on it.
Next, you will see the setup screen for Smart Online Order that presents you with 3 selectable options; click on the 3rd option and then press next.
You will then be asked to choose a Domain Name for your online order page. Make sure the domain name is one word and doesn't contain .com For example"brightsburgers" the system will add the .com by itself
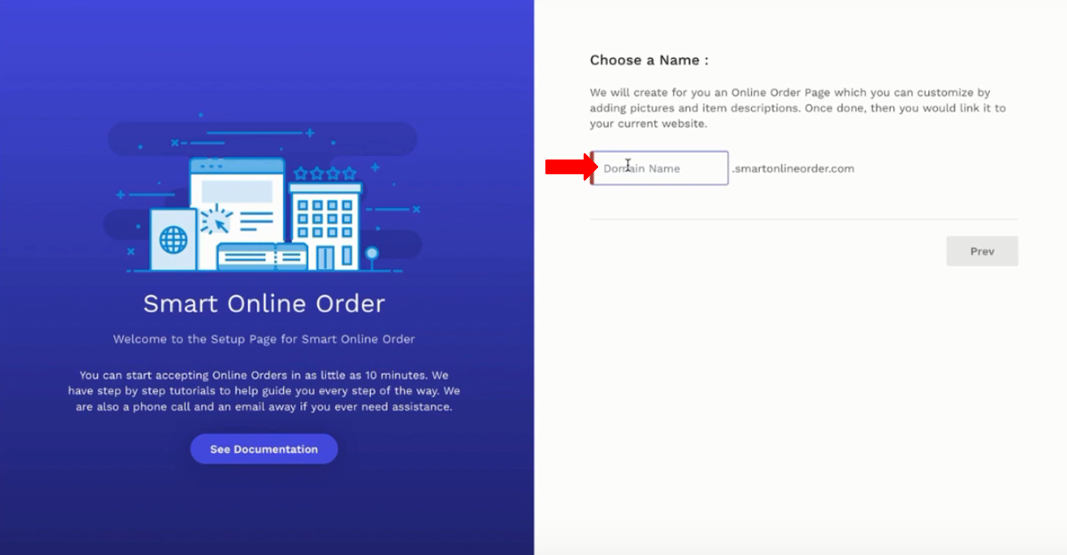
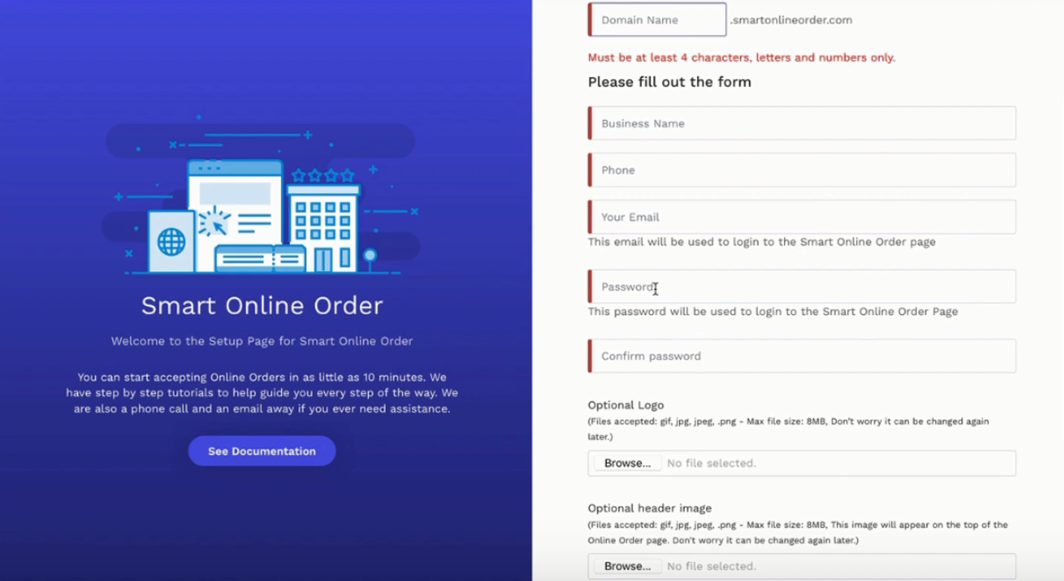
The page will now see if your chosen domain name is available if so it will open the rest of the form. Fill out the form.
It is recommended to upload a logo though if you don't have access to your logo image at the moment you can do that later, the same applies to the header image.
Once complete click on the submit option at the bottom of the page, it will then begin creating your Smart Online Order subdomain. Once complete it will take you to a page with two links
IMPORTANT:
- Ensure to save the two links provided on the following page as they will serve as the link to your subdomain that you will be adding to your website as a button or link for clients to order from.
- The second link will be the login page that you will be using to log into the subdomain to manage your Smart Online Order Page.
Step 3: Update your Clover Business Hours
Updating Business Hours For Your Smart Online Order System
Once Complete your Smart Online Order WordPress plugin should now be ready to begin taking orders barring any plugin/theme/caching incompatibilities.
Step 4: Schedule a Zoom Online Video Onboarding Meeting to learn about Smart Online Order.
Use the following scheduling system in order to set up a Zoom Online Video Onboarding Meeting to learn about how to manage the Smart Online Order system: