Disclaimer
- These instructions would be for WordPress users that would like to install the Smart Online Order WordPress application onto their own site in order to add the Smart Online Order online ordering interface to their WordPress website.
- If you are not a WordPress website user then you will be required to instead use a Smart Online Order subdomain (ex: somebusinessnamehere.smartonlineorder.com) and add a link onto your website in order to direct users to order from said subdomain.
-
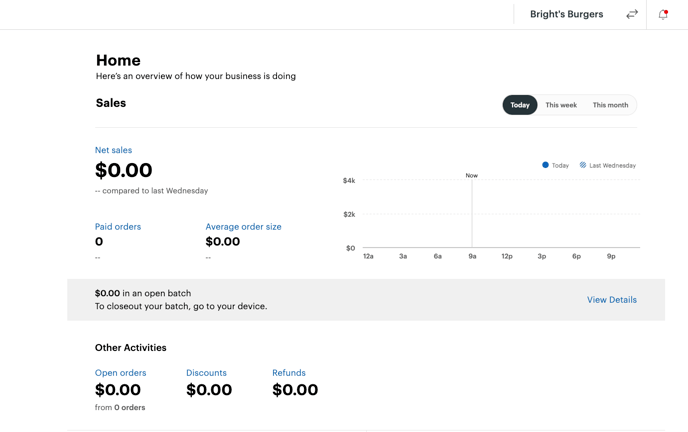
Caching issues for websites with the Smart Online Order plugin installed.
If you have the Smart Online Order website plugin installed on your own website and you notice that items or categories and you have confirmed that you have performed the sync correctly then it may be that you need to exclude pages related to SOO from caching from both your client side and server side caching plugins.
Step 1: Install Smart Online Order onto your Clover Merchant Account
Login into your Clover Dashboard
Use the left-hand side black menu bar and scroll down until you see the option called "More" and click on that option.
In the search bar that appears enter "Smart Online Order" and click enter to be taken to the search results page.
Click on the blue icon called Smart Online Order.

You will then be taken to the app listing page for the Smart Online Order application, click on the green connect option.

Step 2: Get your Smart Online Order API:
Once you have installed Smart Online Order onto your Clover Merchant Account. From the left-hand side menu bar scroll down until you see the option called "Smart Online Order" and then click on it.
- If you do not see it then it is likely not installed yet and you will need to install Smart Online Order from the Clover Marketplace else you will not be able to continue.
- The plugin will not and cannot work with the Clover API key, you will be required to install our Smart Online Order Clover Application onto your Clover Merchant Account.
Next, you will see the setup screen for Smart Online Order that presents you with 3 selectable options; click on the first one and then press next.
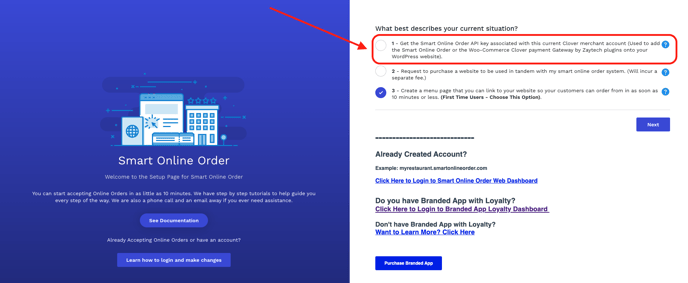
You will now be provided with the Smart Online Order API for your currently selected merchant account.
Leave this page open or copy it and save it to a document that you can easily reach as you will need to use the Smart Online Order API key in the following step.
Step 3: Installation and initial setup of the Smart Online Order application onto your WordPress Website
Install and activate the following plugin onto your WordPress website:
Once activated you will now see a red "Clover Orders" option on your left-hand side WordPress dashboard menu.
Click on it then choose settings.
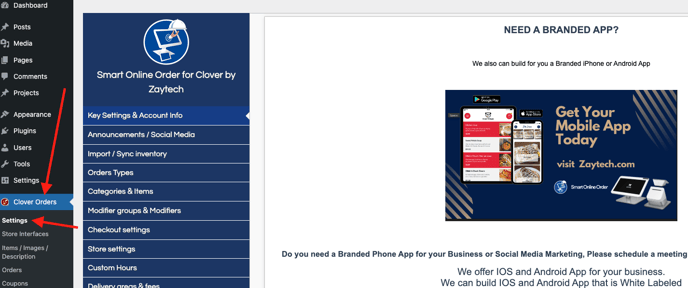
You will then be taken to the setup page for the Smart Online Order WordPress plugin.
Enter the Smart Online Order API key that you received from the previous step into the field called API key then click save.
The page will then reload if the API key has been verified and take you to the full Smart Online Order settings where you will now be able to manage your Smart Online Order system going forward.
Step 4: One-time menu import
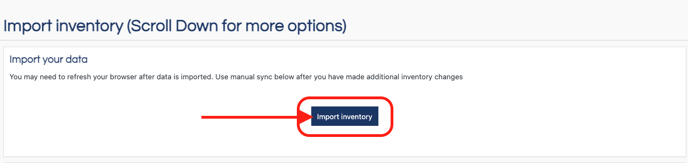
Once on the Smart Online Order website plugins settings page from the blue menu on the left-hand side, you will be clicking on the section called import/sync inventory.
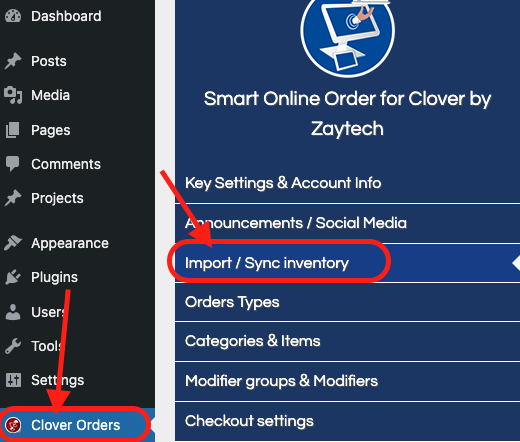
On the following page, you will then need to click on the option called "Import Inventory" to do the initial connection to your Clover Merchant account.
- You will only be clicking on import inventory for this one time to connect to your Clover Merchant account, going forward when needing to add new or remove old times no longer available on your Clover Inventory you will need to perform a manual sync and clean using the options at the bottom of this page else your inventory will not be updated.
- The following link will show you how to perform a manual sync and clean in order to update your menu correctly:
How to perform a manual sync and manual clean
Step 5: Update your Clover Business Hours
Updating Business Hours For Your Smart Online Order System
Once Complete your Smart Online Order WordPress plugin should now be ready to begin taking orders barring any plugin/theme/caching incompatibilities.
Step 6: Schedule a Zoom Online Video Onboarding Meeting to learn about Smart Online Order.
Use the following scheduling system in order to set up a Zoom Online Video Onboarding Meeting to learn about how to manage the Smart Online Order system: